Integrating Acunetix with Jenkins for CI/CD
This document outlines how to:
Note:
|

How to configure Jenkins to integrate with Acunetix
There are four steps to this process:
- Install the Acunetix plugin for Jenkins
- Identify the Certificate Store path
- Install the certificate into your Java Keystore
- Configure the integration
Step 1: Install the Acunetix plugin for Jenkins
- In the Jenkins UI, click Manage Jenkins.
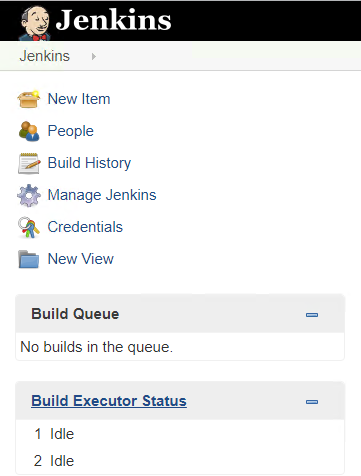
- Select Manage Plugins.

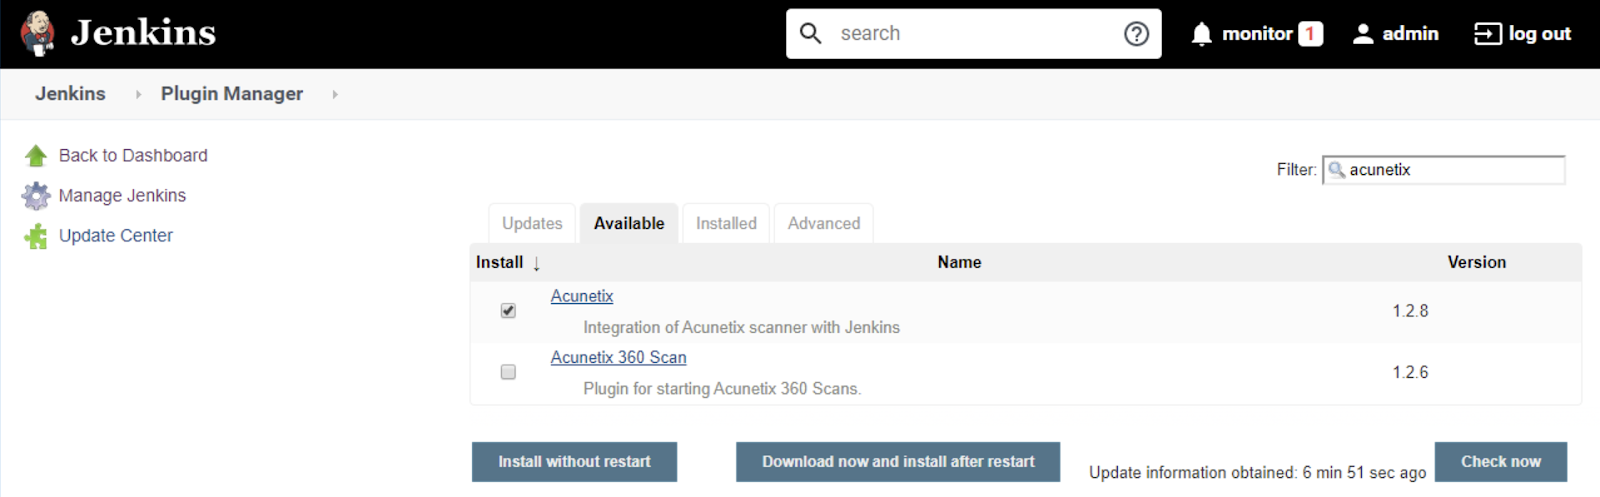
- Open the Available tab.
- Filter for Acunetix and select it from the list of plugins.
- Click Install without restart to start installing the Acunetix plugin for Jenkins. Jenkins will automatically install necessary dependencies, including the Acunetix plugin.
- After installation is complete, select Restart Jenkins when installation is complete and no jobs are running.
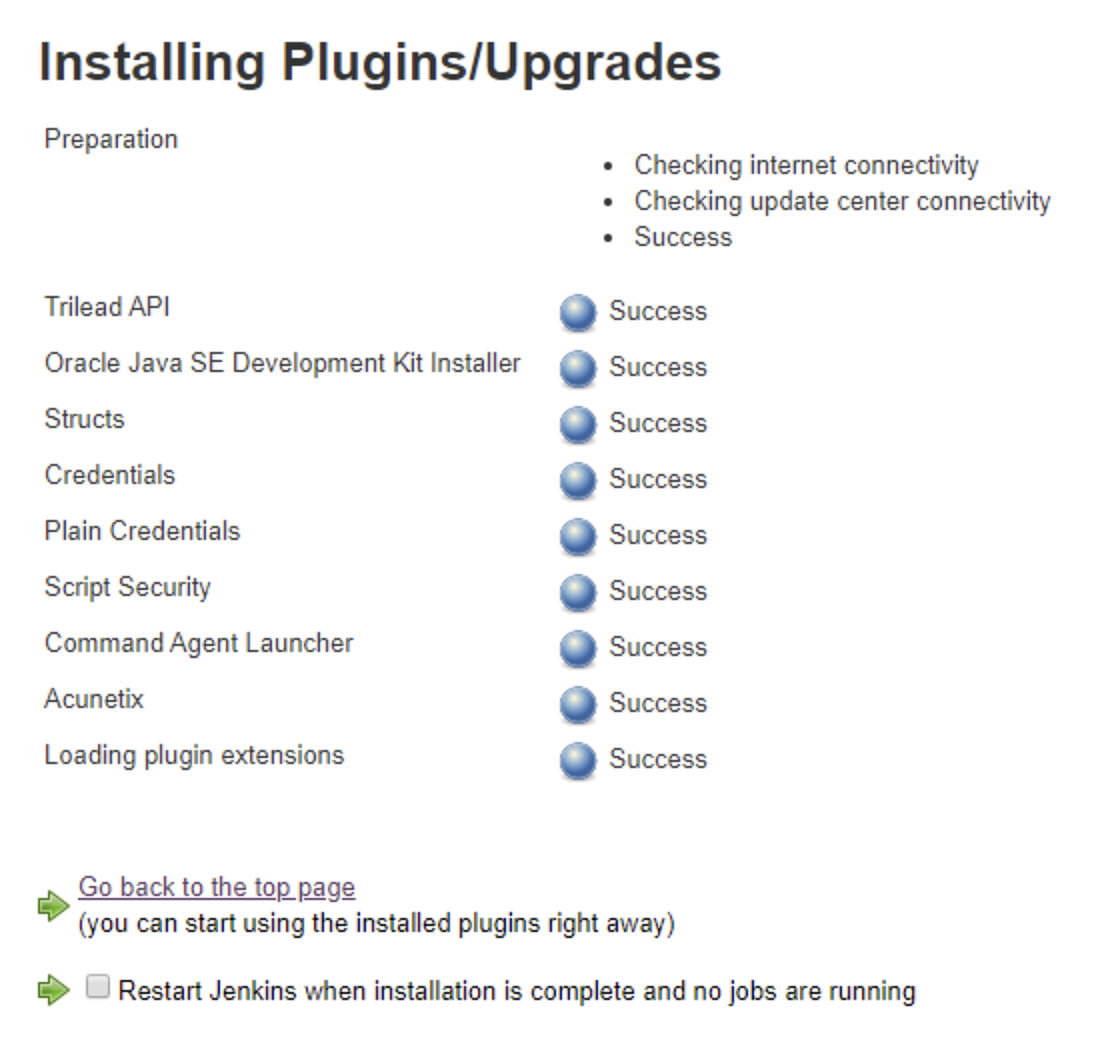
- Wait for Jenkins to restart.
Step 2: Identify the Certificate Store path where you will install the Acunetix SSL Certificate into the Jenkins CA store
The Certificate Store path and file will be JAVA_HOME_FOLDER\lib\security\cacerts. Next, identify the JAVA_HOME_FOLDER for the JAVA binary running your Jenkins service, considering that your machine may have several installations of different Java versions.
About Multiple Java Instances on the Jenkins Machine Note that the Java instance running your Jenkins service is independent of any JDK instances defined in Manage Jenkins > Global Tool Configuration. The JDK instances specified in Global Tool Configuration are utilized by Jenkins during build processes. |
Jenkins on Windows
- First, determine the Java installation running the Jenkins service by inspecting the jenkins.xml file within the Jenkins installation directory for the executable tag.
<executable>%BASE%\jre\bin\java</executable> |

- The %BASE% variable refers to the Jenkins installation directory which is commonly C:\Program Files (x86)\Jenkins.
- To find the java.home directory for the Java instance running the Jenkins service, execute the following command:
"C:\Program Files (x86)\Jenkins\jre\bin\java" -XshowSettings:properties -version 2>&1 | find "java.home" |
- Replace the Java path with the appropriate value obtained from the executable tag in the jenkins.xml file. The output will display the relevant java.home directory.
java.home = C:\Program Files (x86)\Jenkins\jre |
- Since the Certificate Store file in use is JAVA_HOME_FOLDER\lib\security\cacerts, we now know that in this example, the Certificate Store file in use is C:\Program Files (x86)\Jenkins\jre\lib\security\cacerts.
Jenkins on Linux
- To identify the Java binary running your Jenkins service, run the following command in the command line:
ps -aux | grep jenkins |
- You will receive output displaying all processes containing jenkins in the name or path, similar to the following:
jenkins 11044 0.0 0.4 21156 9060 ? Ss 13:42 0:00 /lib/systemd/systemd --user jenkins 11045 0.0 0.1 106264 2620 ? S 13:42 0:00 (sd-pam) jenkins 11058 0.0 0.0 5712 160 ? S 13:42 0:00 /usr/bin/daemon --name=jenkins --inherit --env=JENKINS_HOME=/var/lib/jenkins --output=/var/log/jenkins/jenkins.log --pidfile=/var/run/jenkins/jenkins.pid -- /bin/java -Djava.awt.headless=true -jar /usr/share/jenkins/jenkins.war --webroot=/var/cache/jenkins/war --httpPort=8080 jenkins 11059 3.1 14.0 2623256 287656 ? Sl 13:42 0:22 /bin/java -Djava.awt.headless=true -jar /usr/share/jenkins/jenkins.war --webroot=/var/cache/jenkins/war --httpPort=8080 root 11194 0.0 0.0 6048 888 pts/0 S+ 13:54 0:00 grep jenkins |
- In this case, observe that the Java executable is /bin/java (your system may display a different configuration). However, it is highly likely a symlink to the actual binary installed by the JDK or JRE package, potentially forming a chain of symlinks.
- To determine the java.home directory for the Java instance running the Jenkins service, execute the following command:
/bin/java -XshowSettings:properties -version 2>&1 | grep "java.home" |
- Replace /bin/java in the command with the specific path reported in the commands you executed as explained above. The output will then reveal the relevant java.home directory.
java.home = /usr/lib/jvm/java-11-openjdk-amd64 |
- Given that the Certificate Store file in use is JAVA_HOME_FOLDER/lib/security/cacerts, in this example, we've determined that the Certificate Store file is /usr/lib/jvm/java-11-openjdk-amd64/lib/security/cacerts.
Step 3: Installing the Certificate into your Java Keystore
NOTE: Every installation of Java comes with a default keystore password, which is changeit. Changing this password is usually unnecessary and this document assumes you are aware of your Java keystore password. For all the examples provided, you may need to modify paths to match the correct location of your Java keystore. |
- Install the Certificate into your Java keystore:
- Windows: Run the following from the command prompt:
C:\> keytool -import -trustcacerts -alias AcunetixCA -keystore "C:\Program Files (x86)\Jenkins\jre\lib\security\cacerts" -file C:\ProgramData\Acunetix\certs\ca.cer |
- Linux: Run the following from the command prompt:
[john@localhost] ~]$ keytool -import -trustcacerts -alias AcunetixCA -keystore /usr/lib/jvm/java-1.8.0-openjdk-1.8.0.252.b09-2.el8_1.x86_64/jre/lib/security/cacerts -file /home/acunetix/.acunetix/data/certs/ca.cer |
- Verify the successful installation of the certificate by executing the following command:
- Windows:
C:\> keytool -list -keystore "C:\Program Files\Java\jre1.8.0_251\lib\security\cacerts" -alias AcunetixCA. |

- Linux:
[john@localhost] ~]$ keytool -list -keystore /usr/lib/jvm/java-1.8.0-openjdk-1.8.0.252.b09-2.el8_1.x86_64/jre/lib/security/cacerts -alias AcunetixCA |
- If the certificate installation was successful, you will observe details related to AcunetixCA. Here is an example:
C:\> keytool -list -keystore "c:\Program Files\Java\jre1.8.0_251\lib\security\cacerts" -alias AcunetixCA Enter keystore password: AcunetixCA, 15 May 2020, trustedCertEntry, Certificate fingerprint (SHA-256): E6:01:86:F3:43:33:97:25:71:B9:4E:BC:D9:08:30:AC:18:75:F6:9A:E6:D0:09:1D:D0:90:DF:2A:1D:8E:97:BA C:\> |
Step 4: Configuring Jenkins to Acunetix Integration
- Navigate to Manage Jenkins and select Configure System.

- Scroll to the bottom of the page to get to the Acunetix Plugin configuration section.
- Ensure that the default API URL value is accurate. The Acunetix API URL field, by default, contains the value localhost. It's crucial to use the hostname selected during installation when configuring the Acunetix URL inside Jenkins, as the Acunetix CA certificate is issued on that hostname. Refer to the Connection Issues - Notes & Troubleshooting section further down in this document for additional details.
- If your Jenkins instance is deployed on a different host than your Acunetix instance, make sure Acunetix is reachable from hosts other than localhost. For Acunetix Online, use the URL online.acunetix.com or https://app.invicti.com/api/v1 (for EU-based customers: app-eu.invicti.com).
- Click Add.

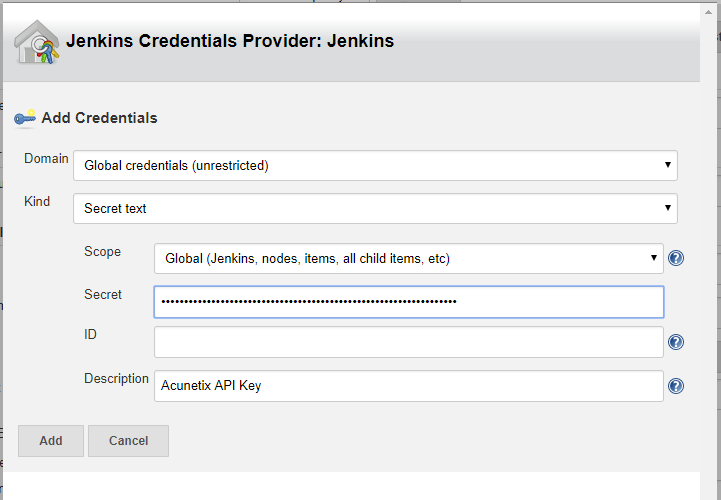
- In the Credentials Provider dialog:
- Set the Kind field to Secret text.
- Set the Scope field to Global (Jenkins, nodes, items, all child items, etc).
- Set the Secret field to the Acunetix API Key. To retrieve the Acunetix API Key, go to the Acunetix UI:
- Go to your Profile .(you must be the administrator user), and scroll to the bottom.
- If you don't have an API Key yet, click Generate new API key.
- Click the Copy button to copy the API key to the clipboard.
- Go back to the Jenkins UI.
- Paste the API Key from the clipboard into the Secret field.
- Optionally, set the Description to something like Acunetix API Key.
- Click Add to complete this step.
- Click Apply to save the Acunetix API Key settings – it is important that you click Apply BEFORE you click Test Connection.
- Click Test Connection. You will see the message Connected Successfully.
Connection Issues - Notes & Troubleshooting
Correct CA Certificate Configuration
When configuring the Acunetix URL inside Jenkins:
- The Acunetix CA certificate is issued on the hostname selected during installation. It is crucial to use the hostname selected during installation when configuring the Acunetix URL in Jenkins.
- If you prefer to use the IP address, generate the Acunetix CA certificate again on the IP address by following this document: Acunetix Security Hardening Guide.
- Using a hostname or an IP inconsistently may result in a Connection refused error in Jenkins.
- For further investigation of the issue, follow the provided instructions for your operating system.
Windows: By default, Jenkins logs are located in %JENKINS_HOME%\jenkins.out and %JENKINS_HOME%\jenkins.err, unless customized in %JENKINS_HOME%\jenkins.xml.
Linux: By default, Jenkins logs are found in /var/log/jenkins/jenkins.log, unless customized in /etc/default/jenkins (for *.deb) or via /etc/sysconfig/jenkins (for *.rpm).
Java Certificate Store Error
If you encounter the following error: Unexpected error: java.security.InvalidAlgorithmParameterException: the trustAnchors parameter must be non-empty
You may need to recreate the cacert file which JAVA uses during SSL exchanges (this example assumes Jenkins installed on Debian 11):
|
How to add an Acunetix Scan as a Build Step in a Jenkins Job
To configure an Acunetix scan as a build step in a Jenkins job, follow these steps:
- Navigate to the configuration of an existing Jenkins job or create a new job.
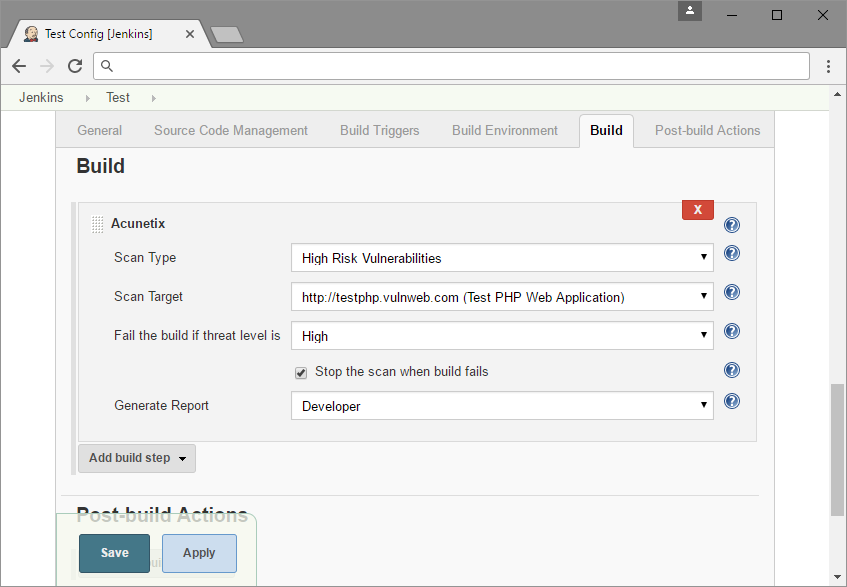
- In the Build section, select Acunetix from the Add build step drop-down.
- Configure the following options:
- Scan Type: Choose a Scan Type for the scan. Scan types help reduce the scope of tests that the scanner runs during the scan.
- Scan Target: Choose a Scan target that you wish to scan. Targets are obtained from Acunetix, and descriptions are provided to distinguish between targets with the same URL.
- Fail build if threat level is: Choose the threat level at which to fail the Jenkins build based on the severity of the scan (High, Medium, or Low).
- Stop the scan when build fails: Check this checkbox to abort the scan when the fail condition is met. This setting is enabled by default.
- Generate Report: Choose a report to generate upon completion of the scan. The report will be accessible inside Acunetix, and a download link will be provided inside the Jenkins job console output.
- Save the Jenkins job configuration.
This configuration allows you to integrate Acunetix scans as part of your Jenkins build process, providing automated security testing for your web applications. Adjust the settings based on your specific requirements and security policies.