Tips on reducing Acunetix scan time
Some hints to reduce Acunetix scan times:
- Select or create your own scan types
- Monitor the average response time
- Scan during off-peak hours
- Set excluded paths for your targets
- Parallel connections
- Retest specific vulnerabilities that have been fixed, rather than scanning the entire web application
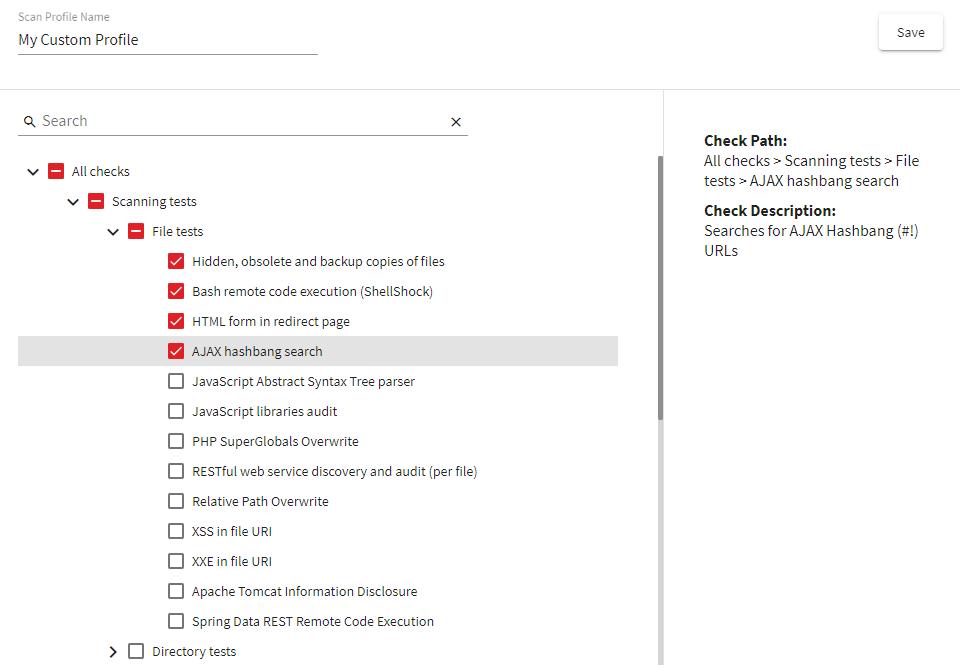
Select or create your own scan types
To create your own custom scan type you will need to:
- Select the "Scan Profiles" option from the sidebar
- Click on the "Add New Profile" button
- Specify a name for your scanning profile in the "Scan Profile Name" field
- Disable or enable any checks that you want to exclude or include in this profile by toggling the checkbox next to each check. Clicking on the folder icons will expand that specific group of checks.
- When done, click the "Save" button to create your scan type
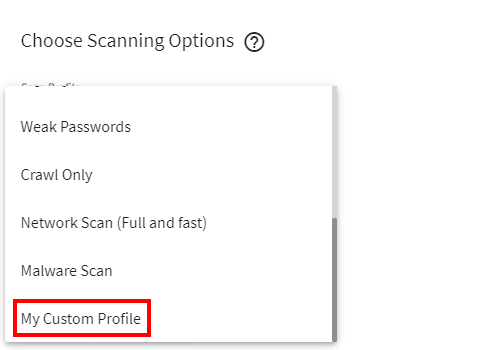
To select a different scan type to use for a scan you will need to:
- Select the "Targets" option from the sidebar
- Select your scan target (by clicking on the check box next to the target address on the left hand side)
- Click the "Scan" button
- From the "Scan Profile" drop-down menu select your scan type
- Click on the "Create Scan" button
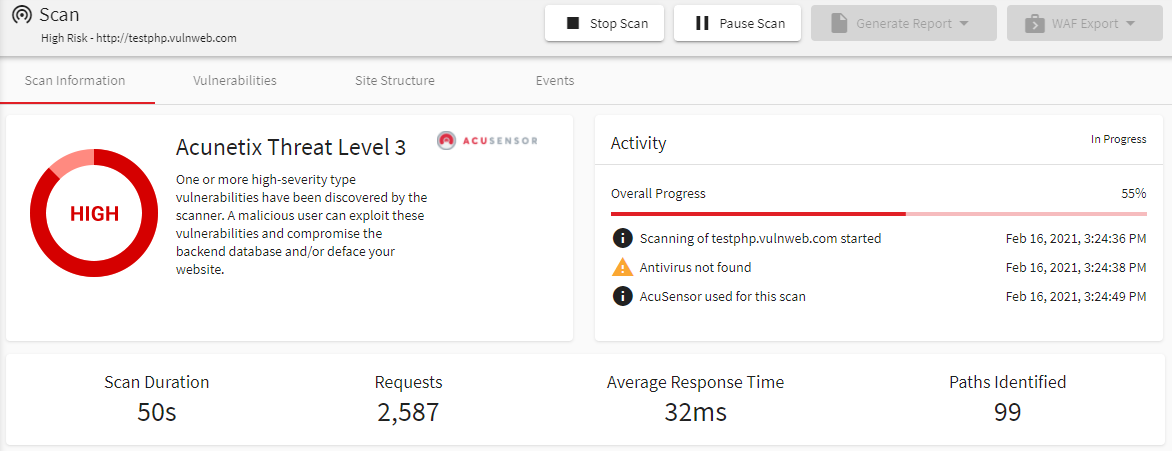
Monitor the average response time
To see the average response time being returned from the server during a scan you will need to:
- Select the "Scans" option from the sidebar
- Click on your scan
- From the "Scan Information" tab check the "Average Response Time" value:
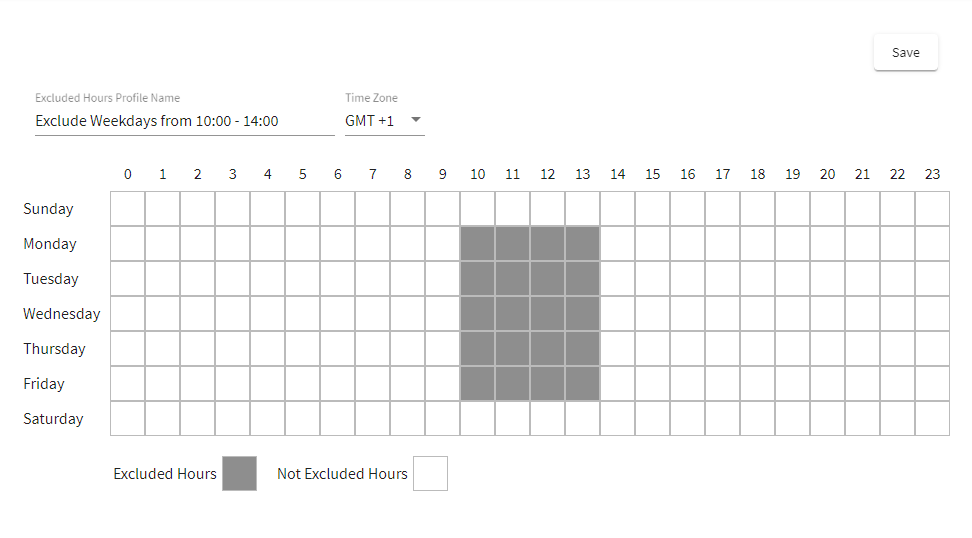
Use the Excluded Hours setting to scan during off-peak hours
To create your own custom excluded hours profile you will need to:
- Select "Excluded Hours" from the sidebar
- Click on the "Add New Profile" button
- Specify a name for your profile in the Excluded Hours Profile field
- Click on the boxes from the graph to exclude certain hours within certain days of the week
- When done, click the "Save" button to create your Excluded Hours Profile
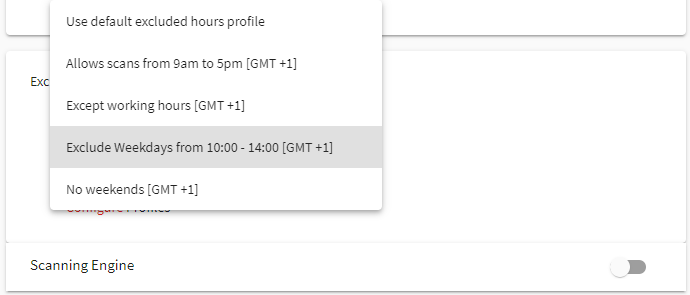
To set exclusion hours for a specific target you will need to:
- Select "Targets" from the sidebar
- Click on your target to edit it
- Scroll down to the bottom of the Target Settings page and expand the "Advanced" section
- In the "Excluded Hours" panel, select a profile from the drop-down list
- Click the "Save" button to apply the changes
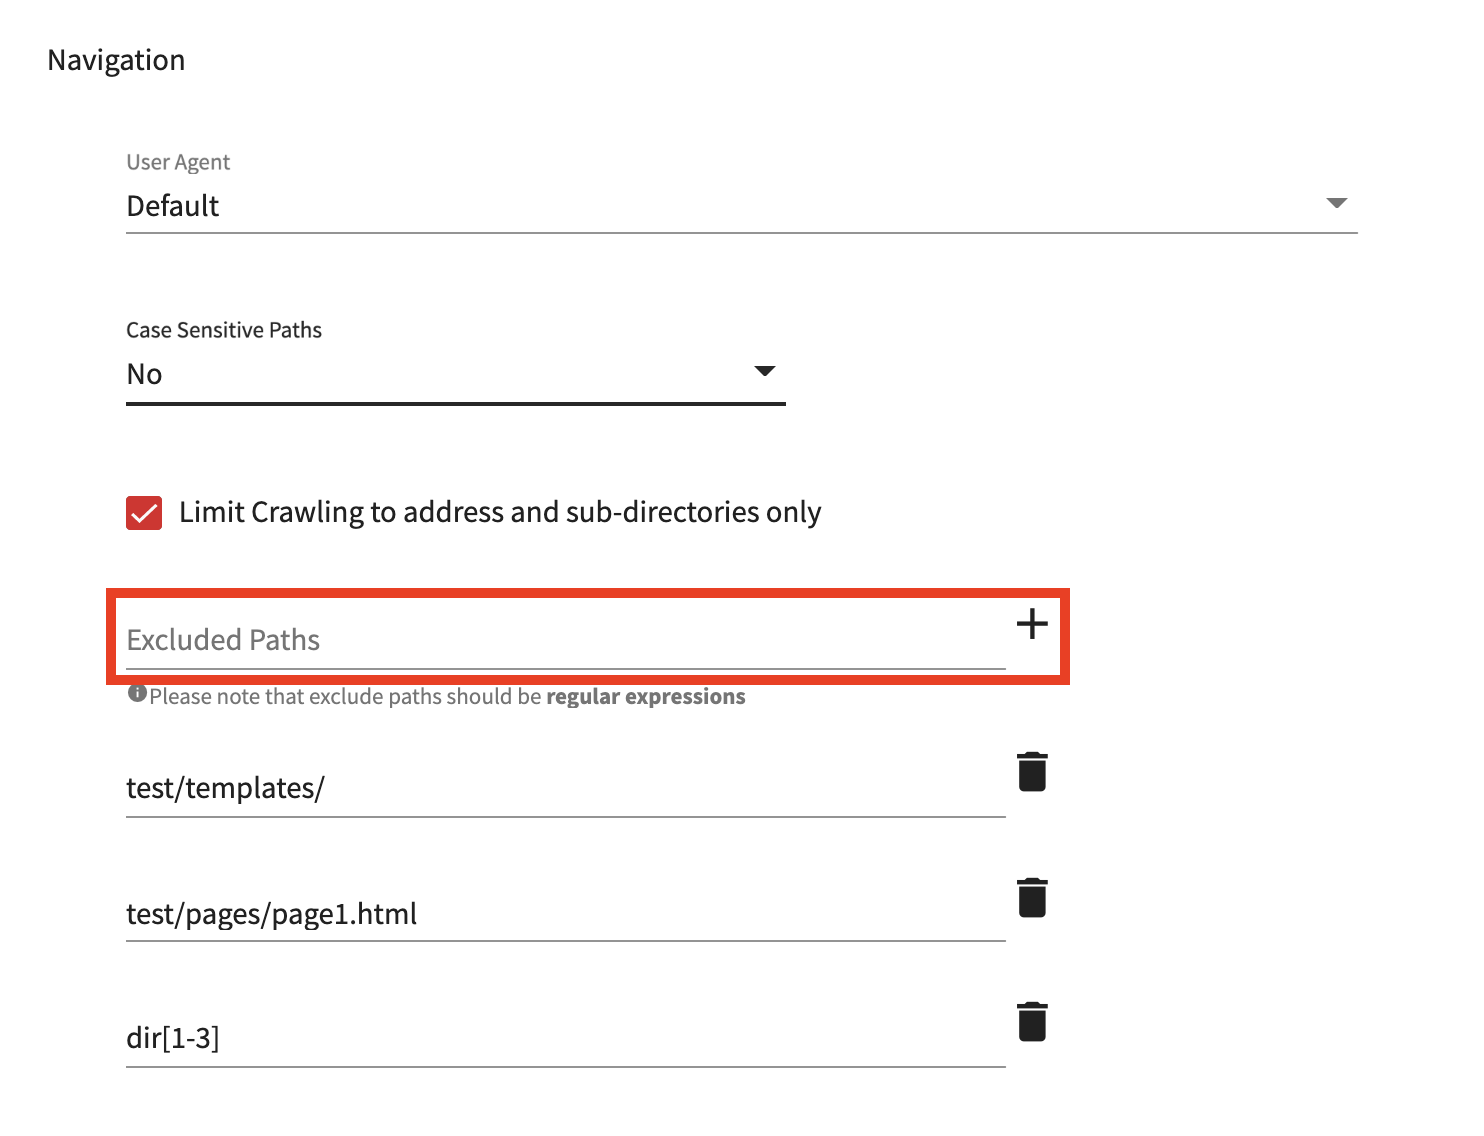
Set excluded paths for your targets
If there are any paths or files that you do not wish to scan, you can set exclusions by following these steps:
- Select "Targets" from the sidebar
- Click on your target to edit it
- Scroll down to the "Navigation" panel in the "Crawling" section
- In the "Excluded Paths" field, enter exclusions for any paths or files and click the "Add" icon. The exclusions can be set using regular expressions, wildcards, and also normal strings
- Click the "Save" button when done
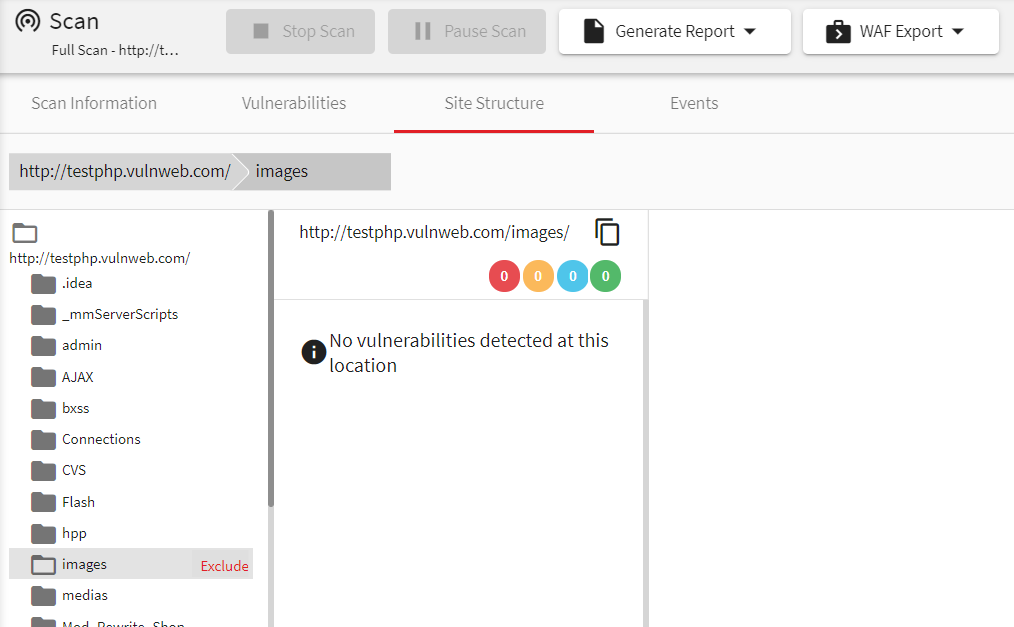
Paths can also be excluded from the Site Structure identified during a previous scan. This can be done as follows:
- Select "Scans" from the sidebar
- Click on your scan for the Target for which you want to configure exclusions
- Navigate to the "Site Structure" tab
- Hover the mouse over the Site Structure, and click on the "Exclude" option to automatically configure exclusion for the specific path.
- The exclusions will be configured in the Target’s settings
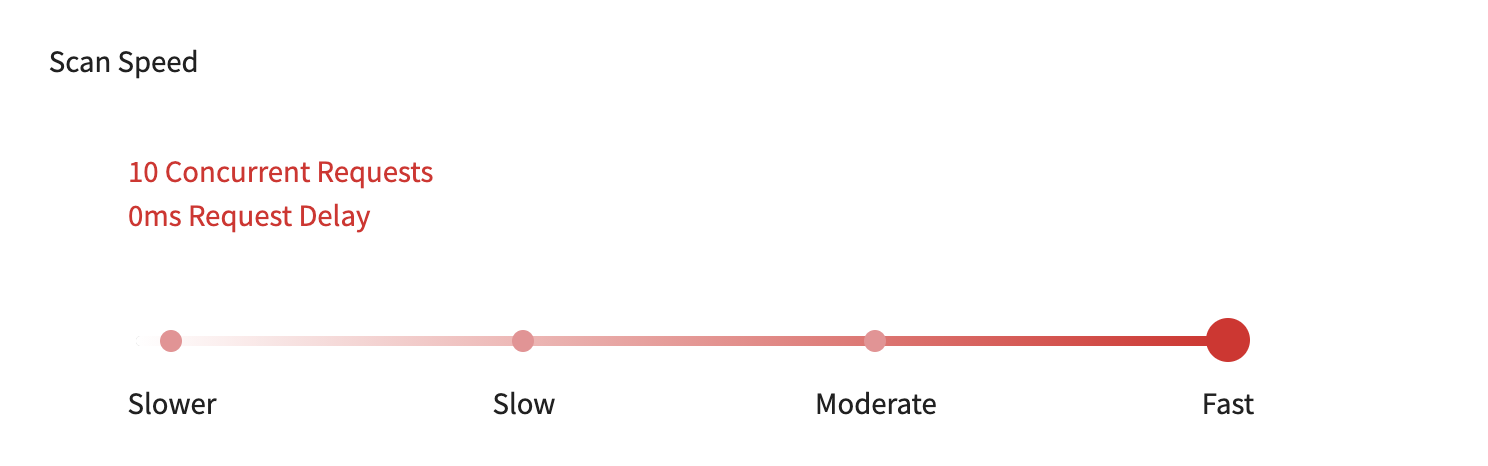
Parallel Connections
If the server is able to handle the load, you can increase the scan speed by following these steps:
- Select "Targets" from the sidebar
- Click on your target to edit it
- In the "Target Information" section, set the "Scan speed" slider to the "Fast" setting
- Click "Save"
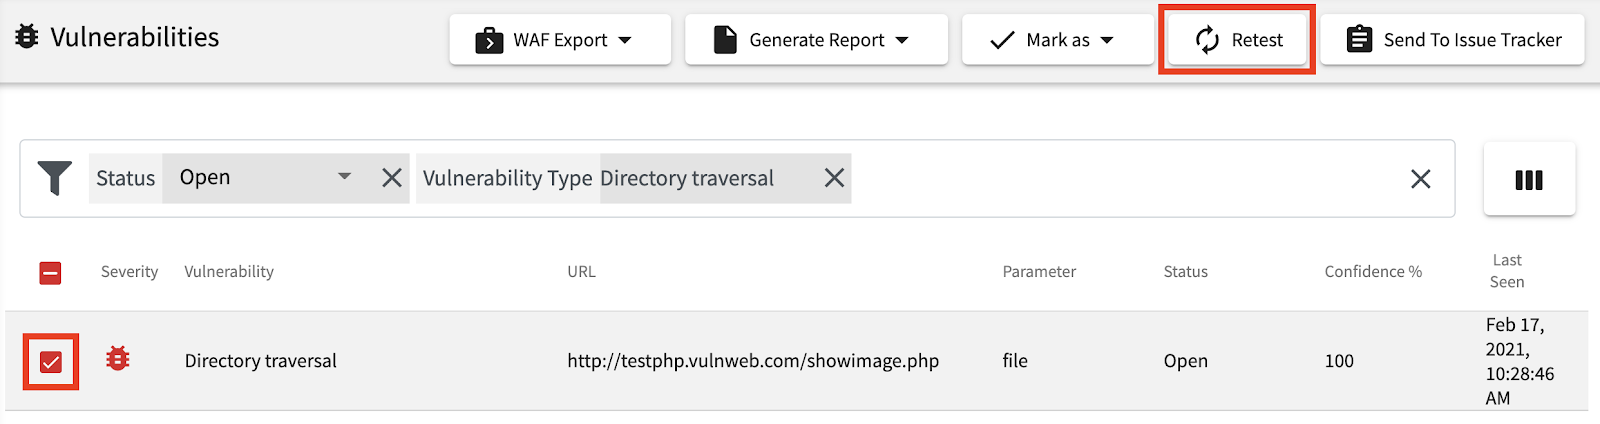
Don’t rescan the entire application, retest specific vulnerabilities that have been fixed
To retest specific vulnerabilities you will need to:
- Select "Vulnerabilities" from the sidebar
- Click on the Vulnerability type you wish to investigate
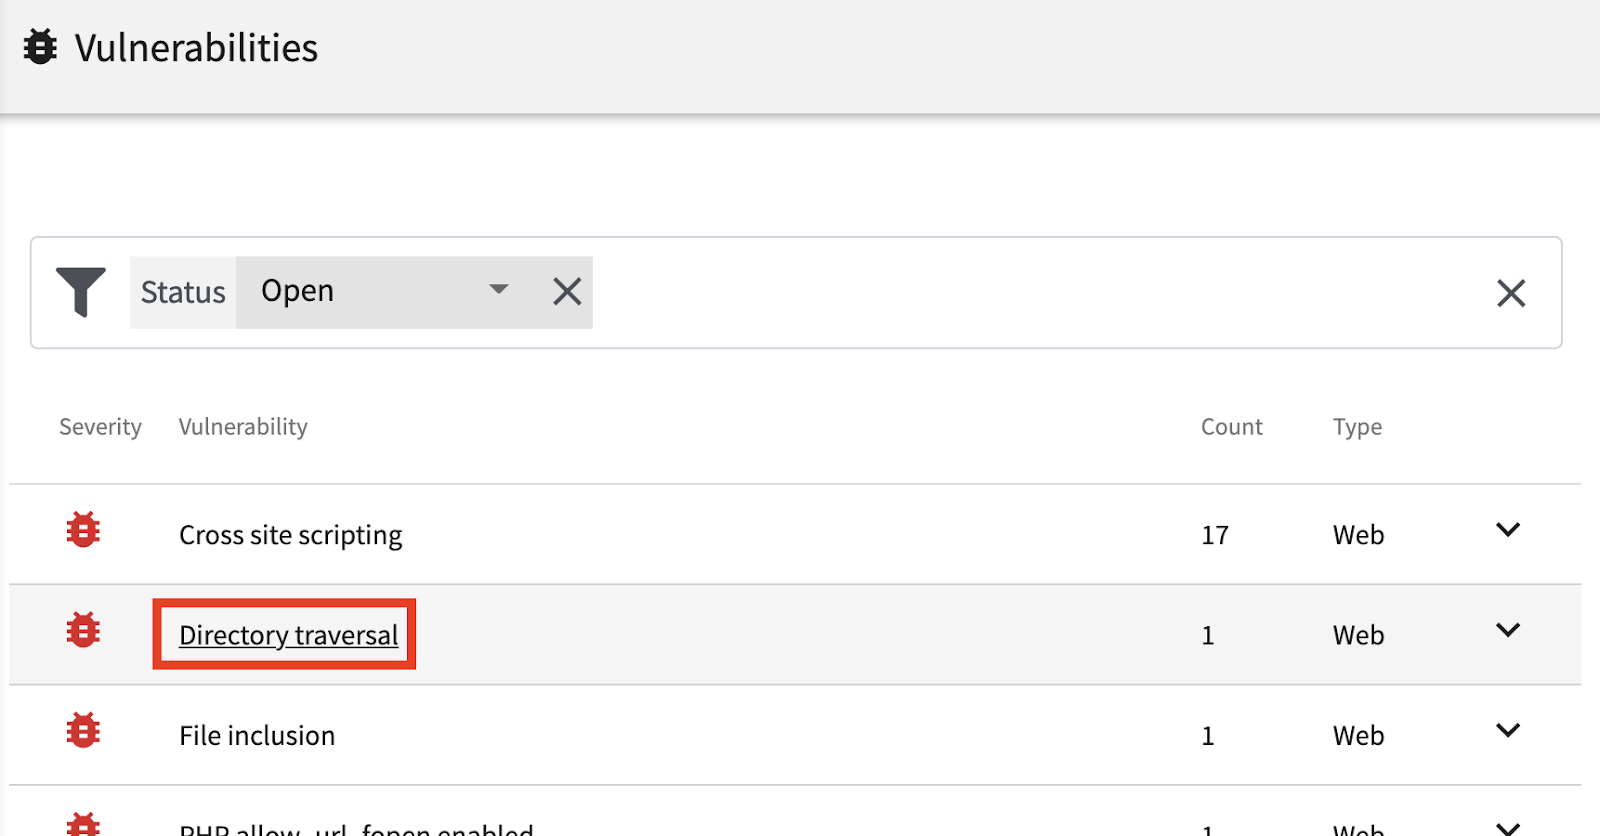
- Click on the checkbox for the specific vulnerability (or vulnerabilities) that you want to retest, and click the "Retest" button