Verify Target Ownership in Acunetix 360
When you add a new target in Acunetix 360, you need to verify its ownership. You can use one of a number of verification methods listed:
- HTML File Upload Verification
- Meta Tag Verification
- TXT Record in DNS Verification
- Email Verification (simplest method)
Information | |
If you have a large number of targets or you are unable to use any of the verification methods listed, contact us on support@acunetix.com so that we can whitelist your account. |

You need to have access to the target for this verification method.
For further information, see Add a Target in Acunetix 360 and Import Targets in Acunetix 360.
How to Verify Ownership of a Target by HTML File Upload
- From the sidebar, click Targets, then Manage Targets.
- Next to the relevant target, click Edit. The Edit Target page is displayed.
- Click Verify. The Verify Ownership page is displayed.
- By default, the File Upload method is displayed.

- Click Download your verification file. The Save dialog is displayed. Select a Save location, then upload it to the root folder of your target.
- Click Verify that is correctly set up to see if the file has been uploaded correctly.
- Click Verify.
- The URL field in the Edit Target page displays a green Verified button, and you are authorized to scan that target.
How to Verify Ownership of a Target by Meta Tag
- From the sidebar, click Targets, then Manage Targets.
- Next to the relevant target, click Edit. The Edit Targets page is displayed.
- Click Verify. The Verify Ownership page is displayed.
- Select the Alternate Methods tab.
- Choose HTML tag.
- Copy the meta tag text from the field and paste it into the <head> tags in the target’s home page.
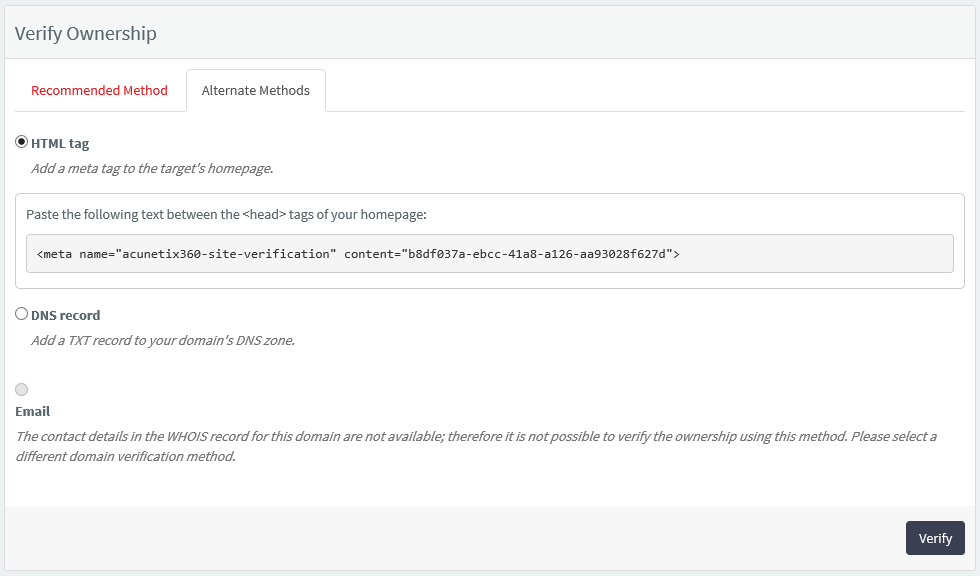
- Click Verify.
- The URL field in the Edit Target page displays a green Verified button, meaning you are now authorized to scan that target.
How to Verify Ownership of a Target by TXT Record in DNS
- From the sidebar, click Targets, then Manage Targets.
- Next to the relevant target, click Edit. The Edit Target page is displayed.
- Click Verify. The Verify Ownership page is displayed.
- Click Alternate Methods.
- Choose DNS record.
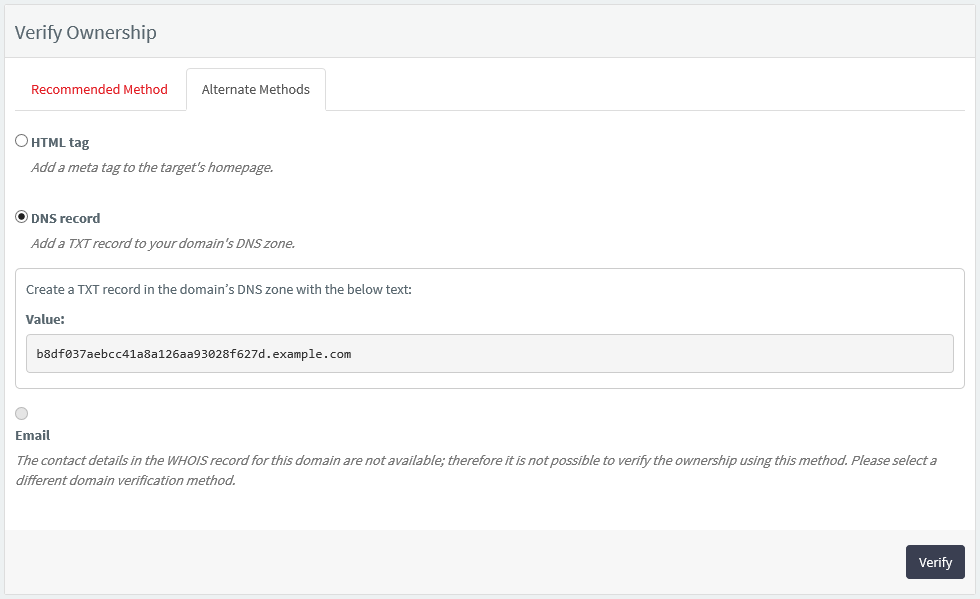
- To use this DNS verification method you need to be able to add a new record to the domain's DNS zone. Add a new TXT record in your domain's zone. The Domain Name and Record (value) for the new TXT DNS record are specified in the verification step.
- Click Verify.
- The URL field in the Edit Target page displays a green Verified button, and you are authorized to scan that target.
How to Verify Ownership of a Target by Email
Information | |
If your Acunetix 360 account is already configured to verify by email (there is an email address listed in the domain's WHOIS entry), you will receive a prompt to do so, when you add a target. (Alternatively, you can select another method at this point.) If not, you can follow these instructions. |
- From the sidebar, click Targets, then Manage Targets.
- Next to the relevant target, click Edit. The Edit Target page is displayed.
- Click Verify. The Verify Ownership page is displayed.
- Click Alternate Methods.
- Click the Email tab.
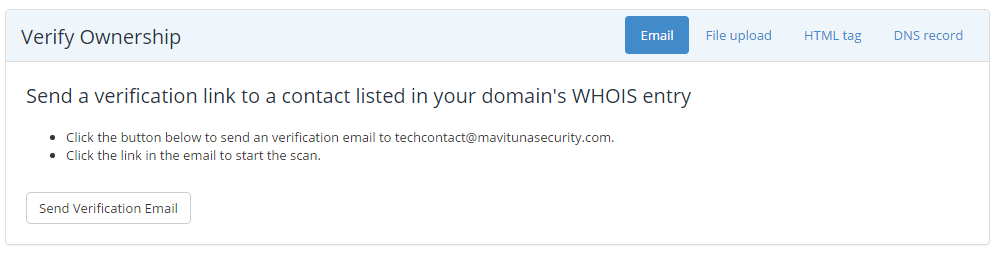
- Acunetix 360 sends an email containing a verification link to the email address listed in the domain's WHOIS entry. Once the verification link is clicked, the URL field in the Edit Target page displays a green Verified button, and you are authorized to scan that target.